
Layers
Layers
Layers let you stack your content like sheets of tracing paper. Write your notes on one layer, mark them up on another, and keep answers or drafts on a third. Each layer can be shown or hidden on its own, so you can see exactly what you need.
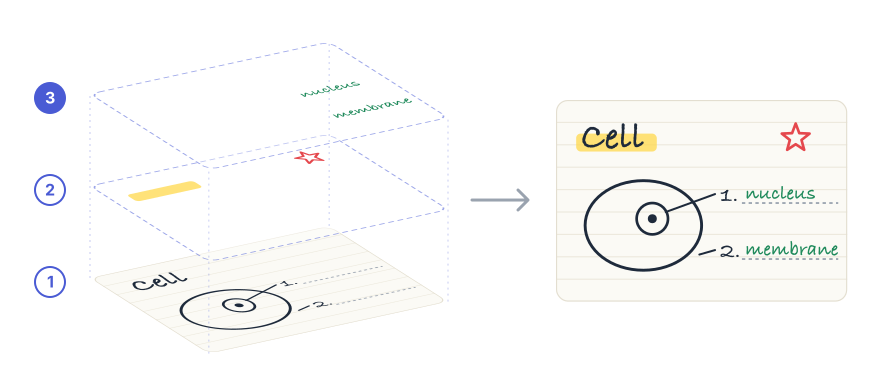
Here are a few ways to use layers:
- Quiz yourself. Write the answers on their own layer, hide it to test yourself, then show it to check.
- Annotate without clutter. Keep your markup for a PDF or a lecture slide on a separate layer, and hide it when you want a clean view.
- Sketch and ink. Draw a rough sketch on one layer and the final lines on another, then hide the sketch.
How Layers Work
- Layers belong to the whole note. Every page in a note shares the same layers. When you hide a layer, it is hidden on every page.
- New content goes on the current layer. Handwriting, text boxes, images, stickers, and tape are all added to the layer you are working on.
- Tools only change the current layer. The lasso, eraser, and Scribble to Erase only work on the current layer, so content on other layers stays safe.
- Layers stack in order. Layers higher in the list appear on top of the layers below them.
Every note starts with one layer, Layer 1. You can add up to five layers per note.
Open the Layers Panel
Tap the Layers button in the toolbar, next to Text, Image, and Sticker. When a note has more than one layer, the button shows the number of the current layer.
On iPad the Layers panel opens as a popover. On iPhone it opens as a sheet at the bottom of the screen.
Add a Layer
In the Layers panel, tap +. The new layer is added just above the current layer, and becomes the current layer.
Adding layers is a Pro feature.
Switch Layers
In the Layers panel, tap a layer to make it the current layer. The current layer has a checkmark and the label Current layer.
You can also tap a text box, image, or sticker on another layer to select it. UltraNotes switches to that layer for you and shows Switched to with the layer’s name. This does not happen while you are writing with a pen.
Show or Hide a Layer
Tap the eye button next to a layer to hide it. Tap it again to show the layer.
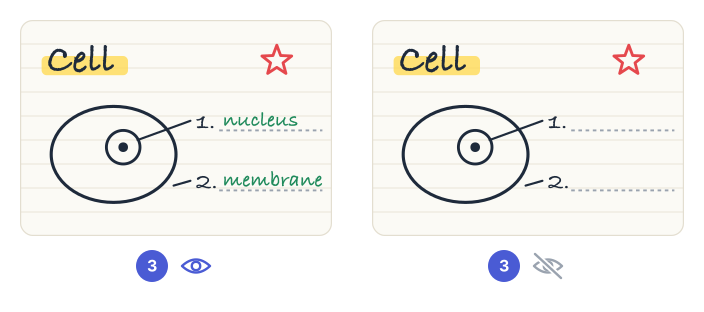
You can’t write or add content to a hidden layer. If the current layer is hidden, UltraNotes shows The current layer is hidden. Show the layer, or switch to another one, to keep writing.
Hidden layers are left out when you export or print a note. Search still finds handwriting and text on hidden layers.
Reorder Layers
In the Layers panel, touch and hold a layer, then drag it up or down. The layer at the top of the list appears in front of everything else.
Rename a Layer
Swipe left on a layer and tap Rename, or touch and hold a layer and choose Rename. Enter a name and tap OK.
Delete a Layer
Swipe left on a layer and tap Delete, or touch and hold a layer and choose Delete. Then confirm.
Deleting a layer removes everything on it from every page in the note. Layer 1 can’t be deleted.
Undo Layer Changes
Tap Undo to reverse adding, deleting, or reordering a layer. Undoing a delete brings back the layer and all its content.
Showing, hiding, and renaming layers can’t be undone. Just change them back.
If the step you undo belongs to another layer, UltraNotes switches to that layer first, then undoes it.